
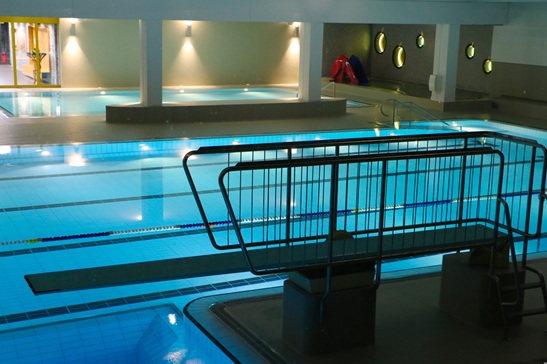
If your pool liner replacement shows wrinkles, fading, or tears, you can expect replacement to restore watertight integrity and make the pool usable again without costly structural work. A proper vinyl liner replacement typically solves leaks and worn surfaces while letting you choose a fresh pattern and fit that extends the pool’s life.
This guide walks you through why liners fail, how to spot the signs, and what the replacement process involves so you know when to act and what to budget for. You’ll get practical steps for measuring, choosing the right liner type, and what to expect during installation so you can plan the job with confidence.
Understanding Pool Liner Replacement
You need to know how to spot liner failure, which liner types exist, and how to pick the right material for your pool size, shape, and budget. The next parts explain clear, specific signs of liner wear, compare common liner materials, and give criteria to choose the best option for your pool.
Signs You Need a New Pool Liner
Look for visible tears, large seams pulling apart, or persistent leaks that require frequent refills. Wrinkling that traps dirt, shrinking away from coping, or balled-up areas along steps indicate the liner has lost elasticity or proper fit.
Check water chemistry damage: faded color, brittle texture, or chalky residue suggest chemical or UV degradation. If repairs become frequent or patches fail within months, replacement will be more cost-effective than repeated fixes.
Also note age and warranty. Vinyl liners typically last 7–15 years depending on thickness and maintenance. If your liner is past that range, or the manufacturer warranty has expired, plan for replacement before structural damage or costly interior work occurs.
Types of Pool Liners
Vinyl sheet liners are the most common for above-ground and many inground pools. They come in stock sizes for standard pools or custom-cut for irregular shapes. Thickness ranges from 20 to 30 mil for above-ground and 30 to 60+ mil for inground; thicker liners resist punctures and last longer.
Thermoplastic and reinforced vinyl options add durability and UV resistance. Pre-formed liners suit small, molded pools but limit design flexibility. Some modern liners include UV inhibitors and antimicrobial coatings to slow fading and biofilm buildup.
You can choose patterned prints (stone, tile look) or solid colors. Patterns conceal dirt and small stains better, while lighter colors improve water clarity and reduce heat absorption. Cost varies by material, thickness, and whether the liner is stock or custom.
Choosing the Right Pool Liner Material
Match liner thickness to pool type and expected use. For above-ground pools choose 20–30 mil; for inground, select 30–60+ mil depending on soil conditions and exposure. Thicker liners handle furniture, heavy foot traffic, and sharper debris more reliably.
Consider climate and sun exposure. If your pool sees intense UV or large temperature swings, pick a liner with UV stabilizers and a higher-quality vinyl formulation to reduce cracking and fading. Ask manufacturers for test ratings or expected lifespan in similar climates.
Factor installation and long-term costs. Custom liners fit better and reduce wrinkles but cost more upfront. Also weigh warranty length and what’s covered—seams, delamination, fading—and choose an installer with references for proper measurement and seam workmanship to maximize liner life.
Pool Liner Replacement Process
You will prepare materials, measure and order the correct liner, remove the old liner, inspect and repair the shell and floor, install the new liner, and refill and balance the pool water. Expect most residential jobs to take a few days to a week depending on repairs and liner lead time.
Preparing for Pool Liner Installation
Confirm pool type and measurements first: interior dimensions, depth profile, and the location of steps and coves. Order a custom vinyl liner made to your exact measurements and pattern; off-the-shelf liners often fit poorly and cause wrinkles.
Gather tools and supplies: shop vacuum, sump pump, pry bar, utility knife, seam tape, pool-safe adhesive, replacement coping or bead if needed, and a clean, dry tarp to protect the liner during handling. Arrange for a dumpster or waste bags to remove the old liner and any degraded foam or underlayment.
Schedule competent help. You can DIY for small above-ground pools, but inground liner replacement usually requires at least two experienced people or a professional installer. Clear the area of furniture and hazards and plan for 24–48 hours of uninterrupted work during installation.
Step-by-Step Replacement Guide
Drain the pool fully using a submersible pump and follow local discharge rules. Remove the old liner by cutting it into manageable sections; discard with appropriate waste handling.
Inspect the shell: check for cracks, broken tiles, loose coping, and soft spots in the floor. Repair concrete, gunite, or vinyl-coated surfaces; re-level or add a new sand/cushion layer if the floor has settled. Replace or repair pool returns, skimmers, and light fixtures as needed.
Measure and fit the new liner dry, then install the bead or overlap system per liner type. Work slowly to center the liner and smooth wrinkles using a soft broom and hand smoothing; use a shop vacuum to pull wrinkles out at the bead area if required. Begin refilling slowly, trim excess material at fittings, and reconnect plumbing. Balance chemicals and run filtration once water reaches operational levels.
Common Installation Challenges
Poor measurements create wrinkles, gaps, or an ill-fitting liner that shortens life and looks unprofessional. Verify measurements twice—length, width, and depth at multiple points—before ordering.
Uneven pool floors or hidden damage will force repairs that extend the timeline. Use a straightedge and level to check for soft spots; small depressions can be filled, but major structural issues require contractor intervention.
Wrinkling around steps and curves presents a frequent fit challenge. Plan for trained hands during the final smoothing and vacuuming phase. Weather also affects installation: high heat stretches vinyl and cold makes it stiff; choose a mild, dry day for best results.
Post-Installation Care Tips
Wait 24–48 hours after filling before running heaters or heavy chemical changes to allow the liner to seat. Check bead locks and fittings after initial fill and again at 24 hours.
Establish a water-care routine: test pH, alkalinity, and chlorine daily for the first week, then at least twice weekly. Maintain pH 7.2–7.6 and alkalinity 80–120 ppm to protect vinyl and adhesives.
Inspect the liner monthly for small tears or seam separation; repair minor punctures with a vinyl patch kit immediately. Keep sharp objects, metal ladders, and pet nails away from the liner surface to prolong its life.


Leave a Reply